The Bridge School

Programs, Strategies and Perspectives – Setting the standard

  • Self-Determination Program – Developing critical self-advocacy and independence skills
  • CVI – From assessment to intervention – Developing functional use of vision
  • Curriculum – Planning and implementing modifications and accommodations for access to education
  • Communication – Skill areas and strategies for developing proficiency in use of AAC

more info

Learning to formalize a plan: Students choose a long-term goal and write a step-by-step plan.

Purpose

The purpose of this activity is to guide students through the process of choosing a goal to work towards and writing down their plan to get there. Students learn to break goals down into manageable steps to make them easier to reach. In order to provide additional support and practice with this lesson we used an interactive tool called “Making a Change-Your Personal Plan” from TeensHealthLink . This interactive tool provides a framework for use in developing a plan to achieve goals. However, the online tool was not accessible for our students to complete independently, so we adapted it using the authoring program, Classroom Suite.
Activity

Two panel image with text and a KidsHealth logo in the upper left corner.
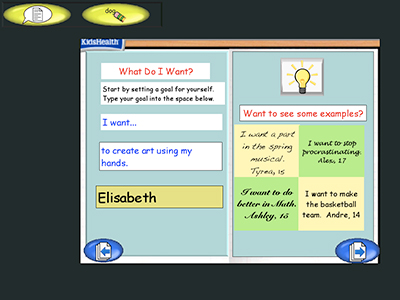
Text over image: What Do I Want?
Start by setting a goal for yourself.
Type your goal into the space below.
I want…
To create art using my hands.
Elisabeth
Want to see some examples?
I want a part in the spring musical Tyson, 15
I want to stop procrastinating, Alex, 17
I want to do better in math, Ashley, 13
I want to make the basketball team, Andre, 14

Step 1

Students choose a goal that they want to work towards. In this example, Elisabeth chose to “Create art using her hands” as her goal. She chose this goal from her completed Framing A Future (FAF) survey.
Two panel image with text and a KidsHealth logo in the upper left corner.
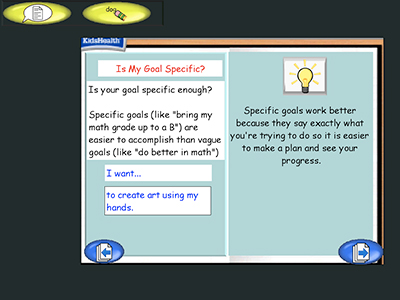
Text over image: Is My Goal Specific?
Is your goal specific enough?
Specific goals (like "bring my math grade up to a B") are easier to accomplish than vague goals (like "do better in math")
I want...
to create are using my hands
Specific goals work better because they say exactly what you're trying to do so it is easier to make a plan and see your progress.

Step 2

Students use the tips and examples provided to determine whether the goal they have selected is specific enough. If needed, they can adjust the goal so it is more attainable in the timeframe allotted and so that they can monitor their own progress more readily.
Two panel image with text and a KidsHealth logo in the upper left corner.
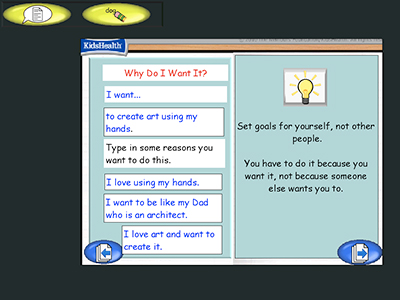
Text over image: Why Do I Want It?
I want...
to create art using my hands.
Type in some reasons you want to do this.
I love using my hands.
I want to be like my Dad who is an architect.
Set goals for yourself, not other people.
You have to do it because you want it, not because someone else wants you to.

Step 3

Students are asked to think about and then write down the reasons that they personally want to achieve the goal they have selected.
Two panel image with text and a KidsHealth logo in the upper left corner.
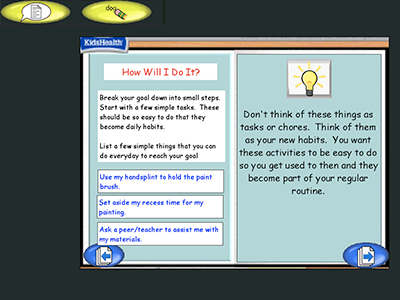
Text over image: How Will I Do It? Break down your goal into small steps. Start with a few simple tasks. These should be so easy to do that they become daily habits.
List a few simple things that you can do everyday to reach your goal.
Use my handsplint to hold the paint brush.
Set aside my recess time for my painting.
Ask a peer/teacher to assist me with my materials.
Don't think of these things as tasks or chores. Think of them as your new habits. You want these activities to be easy to do so you get used to then and they become part of your regular routine.

Step 4

Students think about how they can accomplish their goal by identifying the things they can do to make sure it will happen.
Two panel image with text and a KidsHealth logo in the upper left corner.
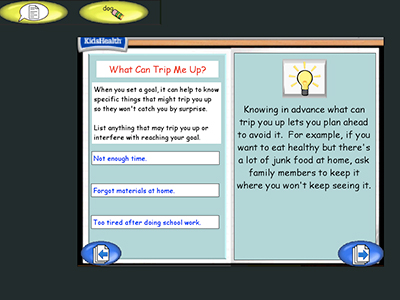
Text over image: What Can Trip Me Up?
When you set a goal, it can help to know specific things that might trip you up so they won't catch you by surprise.
List anything that may trip you up or interfere with reaching your goal.
Not enough time.
Forgot materials at home.
Too tired after doing school work.
Knowing in advance what can trip you up lets you plan ahead to avoid it. For example, if you want to eat healthy but there's a lot of junk food at home, ask family members to keep it where you won't keep seeing it.

Step 5

Students are asked to identify and list obstacles that could get in the way of making progress towards their goal. By acknowledging the things that might interfere with their progress, they will be better able to work around these roadblocks.
Two panel image with text and a KidsHealth logo in the upper left corner.
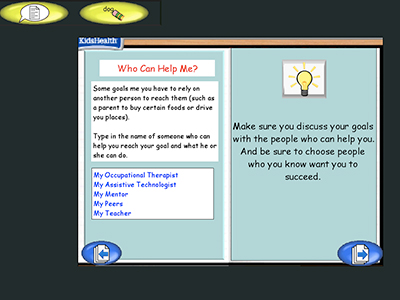
Text over image: Who Can Help Me?
Some goals me you have to rely on another person to reach them (such as a parent to buy certain foods or drive you places).
Type in the name of someone who can help you reach your goal and what he or she can do.
My Occupational Therapist
My Assistive Technologist
My Mentor
My Peers
My Teacher
Make sure you discuss your goals with the people who can help you. And be sure to choose people who you know want you to succeed.

Step 6

Students identify the individuals who can support them in working towards their goal. In addition to their mentor and teachers, students should also select the people who can be most helpful in achieving a particular goal. For example, Elisabeth selected her Occupational Therapist and Assistive Technologist because her goal to create art involved use of her hand and adaptive tools.

Step 6 In Action

The OT and AT design an adaptive art tool for Elisabeth.
Two panel image with text and a KidsHealth logo in the upper left corner.
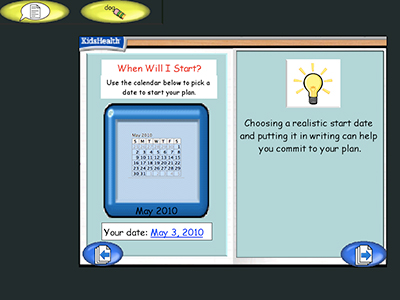
Text over image: When Will I Start?
Use the calendar below to pick a date to start your plan.
(Image of a calendar displaying the month of May 2010)
Your date: May 3, 2010
Choosing a realistic start date and putting it in writing can help you commit to your plan.

Step 7

Students are encouraged to set a start date that is realistic in relation to all of their other commitments after considering everything that needs to be in place.
Two panel image with text and a KidsHealth logo in the upper left corner.
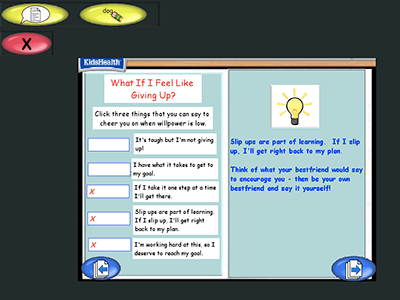
Text over image: What If I Feel Like Giving Up?
Click three things that you can say to cheer you on when willpower is low.
It's tough but I'm not giving up! (not clicked)
I have what it takes to get to my goal. (not clicked)
If I take it one step at a time I'll get there. (clicked)
Slip ups are part of learning. If I slip up I'll get right back to my plan. (clicked)
I'm working hard at this, so I deserve to reach my goal. (clicked)
Slip ups are part of learning. If I slip up, I'll get right back to my plan.
Think of what your best friend would say to encourage you - then be your own best friend and say it yourself.

Step 8

Students are asked to think of some encouraging words that their friends, mentors and teachers would say to them when their motivation lags. Students can then personalize these inspirational messages for themselves and program these phrases into their communication devices to use when they need a boost.
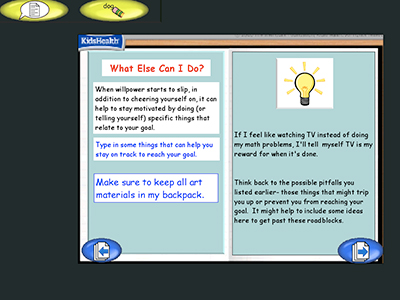
Two panel image with text and a KidsHealth logo in the upper left corner.
Text over image: What Else Can I Do?
When willpower starts to slip, in addition to cheering yourself on, it can help to stay motivated by doing (or telling yourself) specific things that relate to your goal.
Type in some things that can help you stay on track to reach your goal.
Make sure to keep all art materials in my backpack.
If I feel like watching TV instead of doing my math problems, I'll tell myself TV is my reward for when it's done.
Think back to the possible pitfalls you listed earlier - these things that might trip you up or prevent you from reaching your goal. It might help to include some ideas here to get past these roadblocks.

Step 9

Students are asked to refer back to possible obstacles identified in Step 5. Students are asked to list some specific things they could do to try to prevent the obstacles from occurring or work through them if they do arise.
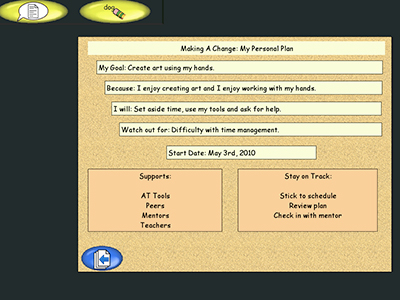
Text over image: Making A Change: My Personal Plan
My Goal: Create art using my hands.
Because: I enjoy creating art and I enjoy working with my hands.
I will: Set aside time, use my tools and ask for help.
Watch out for: Difficulty with time management.
Start Date: May 3rd, 2010
Supports:
AT Tools
Peers
Mentors
Teachers
Stay on Track:
Stick to schedule
Review plan
Check in with mentor

Step 10

The last step in the “Making a Change” personal planning process is for students to summarize the information into a single document that they can refer to. This template provides a framework and has design features that allow students to use their creativity to personalize their goal sheets. Students can then print out their personal plans and post them as guides that they can view every day for inspiration.

Step 10 In Action

Elisabeth is able to create art with her hands.

A personal plan such as this one guides students as they learn how to set goals, anticipate obstacles, solve problems that may arise and maintain their resolve as they work toward achieving their goals.

Adaptations

  • Use an authoring tool (e.g. Classroom Suite) with text-to-speech capability to hear the vocabulary words aloud and answer fields to enter their responses independently.
  • Help students access the internet portion of the activity with their speech-generating devices using computer interface hardware and text-to-speech software that reads aloud web pages.
  • Students generate their responses using their communication devices, or they can use partner-assisted strategies with communication boards during the discussion portion of the activity.